In version 3.0, we’ve introduced a brand-new tab editor. Now it is easier and faster to add custom tabs to WooCommerce.
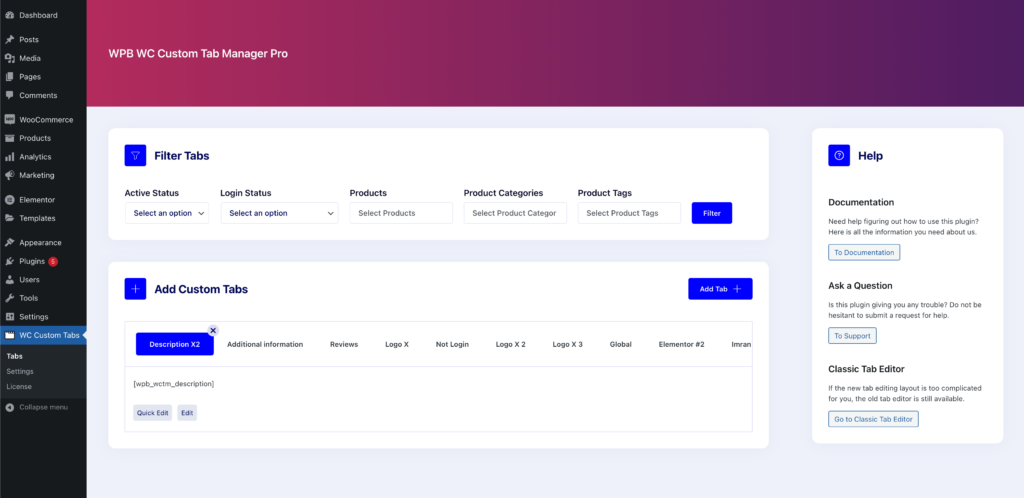
Navigate to your website’s admin area and select WC Custom Tabs. The new tab editor can be found here.
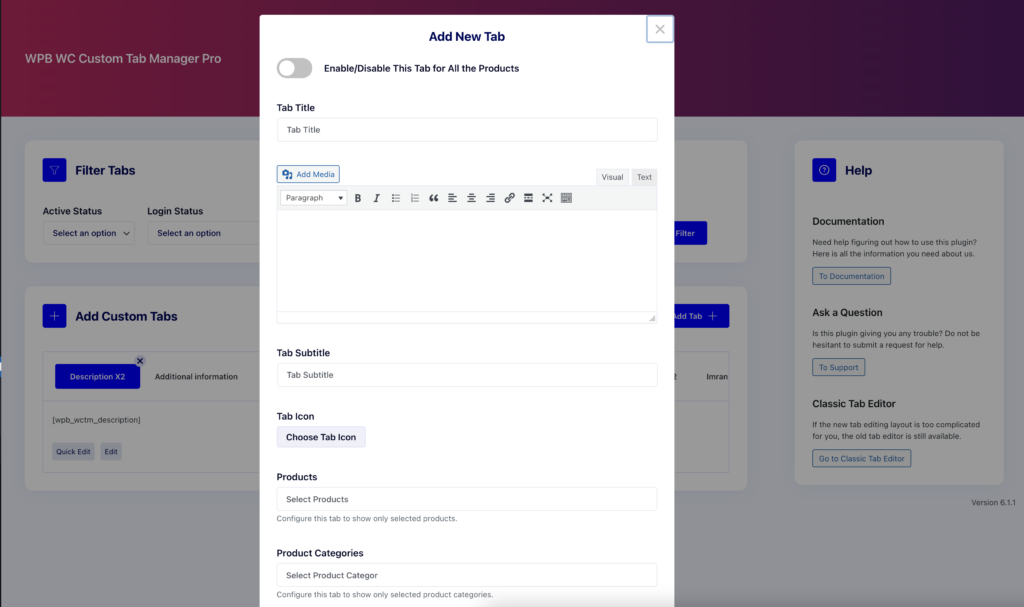
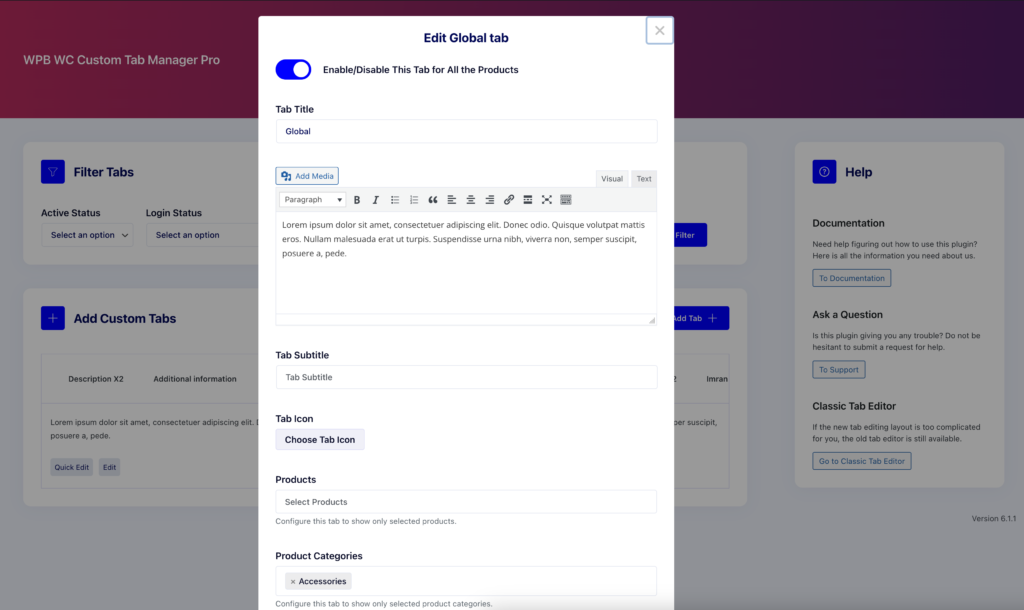
Hit the Add Tab button to bring up a popup window. You can enter your tab title, content, icon, and subtitle here. Also, the tab can be added for all the products or assigned to only selected products or product categories.
To make the tab visible on the product page, make sure the enable tab checkbox is selected.
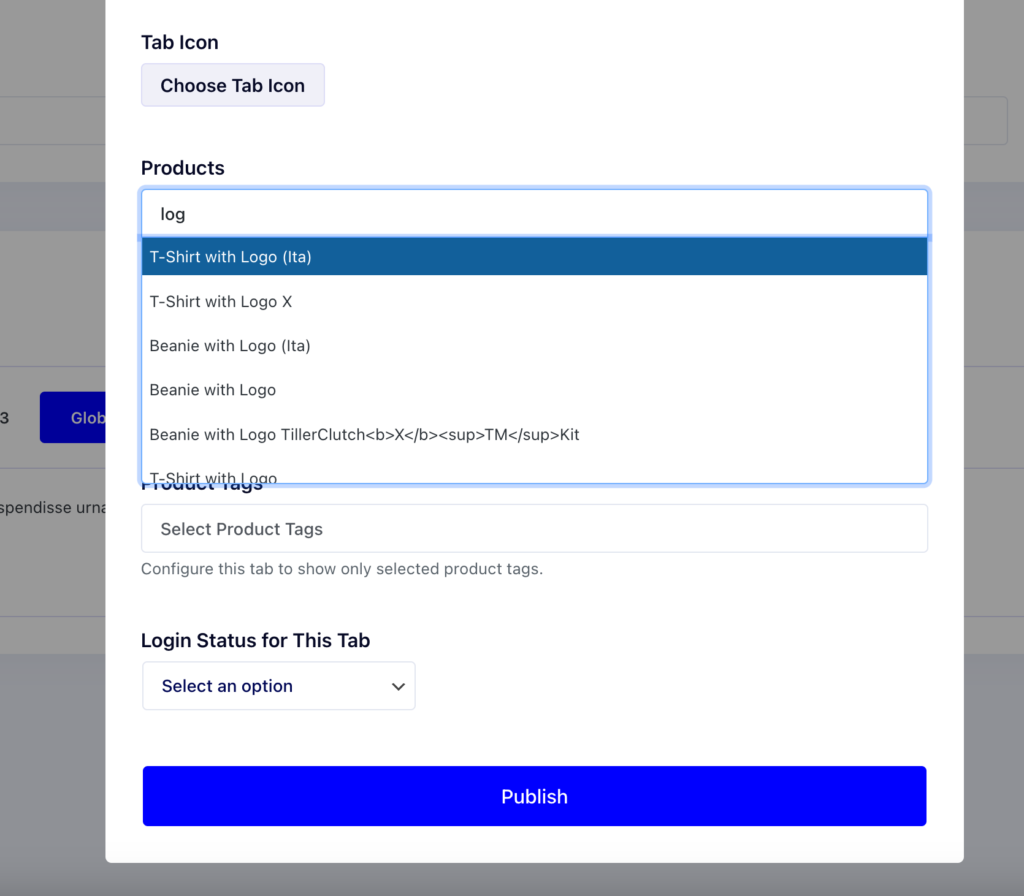
Type three characters to find the tab-assigning products. The same goes for product tags and categories.
When you’re done writing in the tab, click the “Publish” button to save it. It will save the tab’s content in the database, and the tab will be shown on the product page.
If you like the old classic tab editor more, you can access it by clicking the “Go to the Classic Tab Editor” button in the help column.


